
How to Flush Cannabis Plants
An in-depth guide on how to properly flush cannabis plants.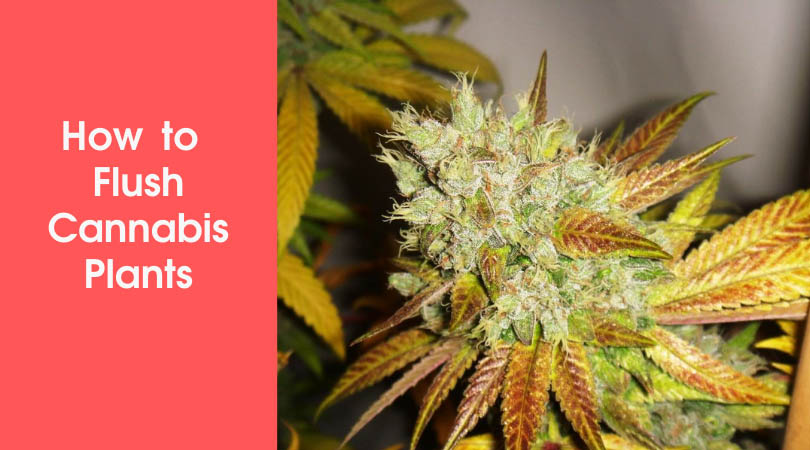 As you learn how to grow cannabis — you’ve likely heard the term flushing.
Flushing cannabis plants is a technique used on multiple occasions during the grow cycle. From pre-harvest to fixing nutrient lockout, flushing allows cannabis cultivators to ensure their buds are loaded with delicious terpenes and mind-blowing cannabinoids.
Ready to learn how and when to flush your weed plants? Read along to learn everything there is to know about flushing marijuana for the best buds imaginable!
What is Flushing And Why Does it Matter?
The flushing technique is a method that floods the medium (soil/soilless) with water to leach out salts accumulated from bottled nutrients.
Flushing may be performed constantly or actively.
Constant flushing is when you overwater your cannabis plants with each watering to allow the medium to drain between 10-20% of the total nutrient solution. Active flushing is when you flush your cannabis plant in a single watering to leach out nutrient build-up.
As you can see, both flushing techniques remove nutrient build-up. However, constant flushing is viewed as a preventative to nutrient build-up, and active flushing is used as an emergency technique.
Now you must wonder — why does flushing cannabis plants matter?
For starters, cannabis plants grown with bottled nutrients may eventually experience:
- Nutrient lockout
- pH swings
- Nutrient toxicity
- Dehydration
Bottled cannabis nutrients have convinced growers that the more nutrients they use — the bigger the buds. The truth, however, is bottle nutrients are composed of salts — instead of their organic counterparts found in soil.
As you feed your cannabis plants, not all of the nutrient is taken up by the roots. Thus, residual nutrient-based salt accumulates in the medium. Over time, the accumulated salt throws the entire medium a curve-ball.
The result of accumulated salt in the grow medium is unhappy cannabis plants and disappointed cannabis cultivators.
Therefore, if you fail to perform a constant or active flush, you may experience:
- Low yield
- Decreased bud density
- Low terpene and cannabinoid content
Now that you understand what flushing is and why it’s essential — it’s time to learn when you should flush your cannabis plants for the best results possible.
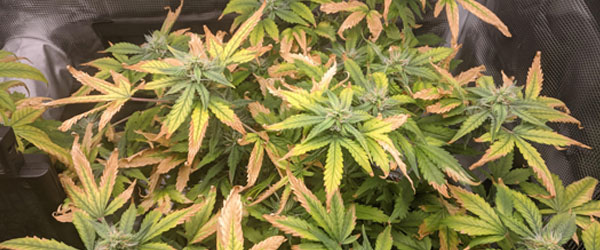
Flushing your cannabis plants removes excess nutrients, which can cause nutrient lockout.
The Best Time to Flush Your Marijuana Plants
Now that you understand the what and why — let’s talk about when you should flush your weed plants.
Overall, three moments fall into the category of the best time to flush your cannabis plants:
- Two weeks before the estimated harvest date
- With each feeding
- During a nutrient lockout
If you decide to flush your marijuana plants two weeks before harvest or during a nutrient lockout — you’ll perform an active flush. If you flush your weed plants with each feeding — you’re performing a constant flush.
How to Constantly Flush Cannabis Plants in Five Easy Steps
If you’re like us and want to avoid a nutrient lockout at all costs, constantly flushing is a tried-and-true method.

Before we discuss how to perform a constant flush, here’s a list of required tools for the job:
- pH meter
- Nutrient meter
Remember, the point of flushing is to reset the growing medium and leach out excess salt-based nutrients. You must have a nutrient and pH meter to perform a successful flush!
Step One: Produce Runoff
First, measure the amount of water needed to produce runoff.
If you’re growing cannabis in a 3-gallon container, you will need 1.5-gallons of water. If you’re growing marijuana in 1-gallon containers, measure a minimum of 0.5-gallons of water.
Step Two: Add Nutrients
Now, add the usual amount of nutrients to the water. Remember, you may continue to feed normal nutrient levels with the constant flush method because you are continuously removing excess salt via runoff.
Step Three: Adjust pH
Next, adjust the pH to a proper level. If growing in soilless media, such as coco coir, adjust the pH to 5.3-5.5. If you are growing cannabis in soil, adjust the water to a pH of 6.2-6.5.
Step Four: Water
Water your cannabis plants with the adjusted nutrient solution. Remember, you must water until you see runoff draining from the bottom of the pots.
As a rule of thumb, aim for 10-20% drainage from the nutrient solution’s total volume.
Step Five: Take pH of the Runoff
Finally, take a sample of the runoff and test the pH and nutrient level with your nutrient and pH meter.
If the runoff is the same pH and EC/PPM as the starting solution — there isn’t any buildup, and your cannabis plants are doing great!
However, if the pH is drastically off or the EC/PPM values are through the roof — you must perform an active flush to get everything back to normal. Remember, pH and nutrient swings cause nutrient lockouts — which cause severe problems for cannabis cultivators.

How to Actively Flush Cannabis Plants in Five Easy Steps
If your cannabis plants exhibit lockout-like symptoms or you wish to perform a pre-harvest flush — active flushing is the ticket!
Before we discuss how to perform an active flush, here’s a list of required tools for the job:
- pH meter
- Nutrient meter
Remember, the point of active flushing is to reset the growing medium and leach out excess salt-based nutrients on a single occasion instead of each feeding.
Step One: Determine pH
First, determine the pH and the salt accumulation in the medium.
To do so, water the cannabis plant with pH-adjusted water. Make sure you water to the point of runoff.
Step Two: Test pH of Runoff
Next, collect a sample of runoff and test the pH and nutrient concentration.
If the pH is far from your baseline pH, such as 5.3 or 6.3 — you’re likely in nutrient lockout territory. If the EC/PPM values far exceed your standard feeding dose, you’re witnessing extreme salt buildup and need to perform an active flush immediately.
On the other hand, if you’re two weeks away from harvest, now’s a good time to perform a pre-harvest flush.
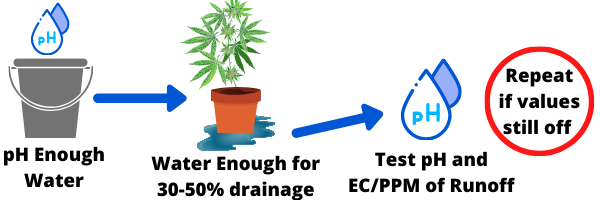
Step Three: pH Enough Water
Next, it’s time to pH enough water to cleanse the media thoroughly of salt buildup.
For example, a 3-gallon pot requires 2-3-gallons of water to produce a substantial amount of runoff.
You must pH the water and avoid adding more nutrients. If you’re growing cannabis in hydroponics, use a pH of 5.3-5.6. If growing weed in soil, maintain a pH of 6.2-6.5.
Step Four: Water
Water your cannabis plants with the pH’d water. Remember, you must water until you see runoff draining from the bottom of the pots. The runoff is likely dark in color due to nutrient accumulation.
As a rule of thumb, aim for 30-50% drainage from the nutrient solution’s total volume. Remember, you want to remove most of the accumulated salts to reset the medium.
Step Five: Test pH of Runoff Again
Finally, take a sample of the runoff and test the pH and nutrient level with your nutrient and pH meter.
If the runoff is the proper pH and EC/PPM is much lower than during step one — you’re doing a great job!
However, if the pH and nutrient values are drastically off — you must return to step one and begin again. Remember, the goal is to ensure the medium is at a proper pH and that nutrients are not accumulating.
Elevate Your Weed to Its Highest Potential
By learning how to flush weed plants, your bag of tricks has a new tool to ensure a healthy crop — every time.
Whether you actively or constantly flush your marijuana plants, the outcome is the same — top-shelf cannabis buds that are loaded with terpenes and cannabinoids.
Now that you’ve completed this guide, it’s time to remember the big picture of harvesting cannabis. Learn How to Harvest Cannabis Flowers, How to Check Trichome Ripeness, How to Dry and Trim Marijuana Flowers, and How to Cure Weed.
By reading all of our guides — you’ll elevate your buds to their highest potential!