How to Grow Weed Outdoors
An indispensable guide for beginners on how to grow weed outdoors. Discover everything you need to pull off the best harvest outdoors imaginable.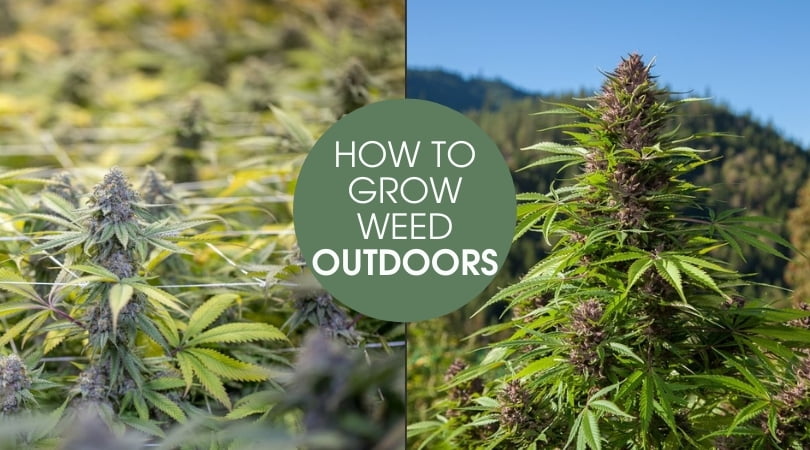 Growing weed outdoors is an experience, unlike any other. From gigantic cannabis trees to outrageously massive harvests, growing cannabis outdoors is beyond rewarding.
As you’ll soon learn, every aspect of nature unites and provides cannabis plants with everything they need. From sunlight to wind, growing marijuana in the great outdoors awaits you.
Now that you’re ready to learn how to grow weed outdoors let’s look at the diverse aspects of outdoor cannabis cultivation.
How Much Does it Cost to Grow Weed Outdoors?
First and foremost — how much does it cost to grow weed outdoors?
If you’re wondering how much it costs to grow weed outdoors, the answer will always be the same — it depends. From $200 to well over $2,000, the cost of growing weed outdoors fluctuates dramatically.
For example, an outdoor grower cultivating one plant versus another grower with ten plants will incur drastically different costs. As the number of plants increases — so do the required resources.
Let’s look at the equipment cost for two different examples — a cultivator with a single cannabis plant and another with ten marijuana plants.

1. The Cost to Grow a Single Cannabis Plant Outdoors
- Feminized Cannabis Seeds: $60-80 per 5-seed pack (MSNL, Crop King, ILGM)
- Autoflowering Cannabis Seeds: $80 per 5-10-seed pack (MSNL, Crop King, ILGM)
- Smart Pots or Plastic Containers: $25 (45-gallon capacity)
- Bottle Nutrients: $30-60 (1-liter Grow and Bloom bottles)
- Potting Soil: $160 for 8-cubic feet (Fox Farm, Root Organics, Dr. Earth)
- Watering Can: $15; 2.5-gallon capacity
- Miscellaneous Hardware: $50 (trimming scissors, trellis netting, support pole)
- Water: The cost of water will depend on your local water district.
- Light: Free
If you grow a single cannabis plant outdoors and hand water, the total cost is roughly $300. However, this cost can be less; however, you must forego bottled nutrients and use your own soil from your backyard.
If you’re one of the lucky few with nutrient-rich soil in your backyard, or you produce your own compost, the cost of growing a single cannabis plant significantly decreases to roughly $150.
2. The Cost to Grow Ten Cannabis Plants Outdoors
- Feminized Cannabis Seeds: $90-120 per 10-seed pack (MSNL, Crop King, ILGM)
- Autoflowering Cannabis Seeds: $100-120 per 10-seed pack (MSNL, Crop King, ILGM)
- 10 Smart Pots: $250 (45-gallon capacity)
- Bottle Nutrients: $90-120 (4-liter Grow and Bloom bottles)
- Potting Soil: $1,440 for 450-cubic feet of soil (Fox Farm, Root Organics, Dr. Earth)
- Soil Amendments: $500-700 for 90-cubic feet of perlite
- pH Meter: $100
- Watering Reservoir: $250; 265-gallon water reservoir
- Aeration Pump: $40-50; commercial aquatic pump
- Miscellaneous Hardware: $200; trellis netting, irrigation kit, support rods, trimming scissors
- Water: The cost of water will depend on your local water district.
- Light: Free
The cost of growing ten cannabis plants outdoors is roughly $3,000. The cost increases as you streamline your grow with the help of automated watering systems, such as drip irrigation.
If you decide to hand water all ten plants, the cost may decrease roughly to $2,000.
Overall, your outdoor garden’s total cost depends on the equipment you decide to use (or not).
Q: How Much Does It Cost to Grow Weed Outdoors?
A: The cost of growing a single marijuana plant outdoors ranges from $150 to 300$. The cost of growing Ten marijuana plants outdoors ranges from $2000 to 3000$.
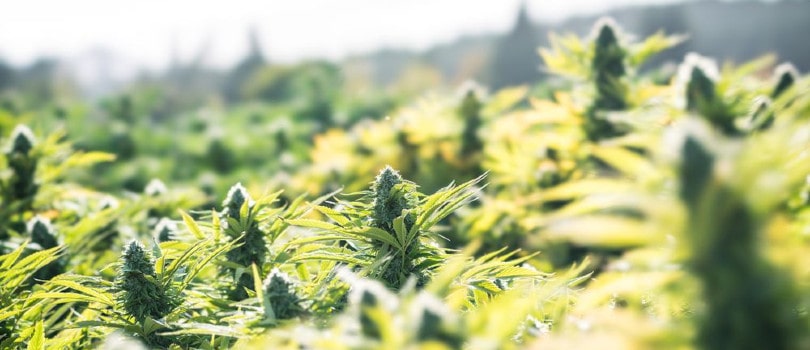
From $200 to well over $2,000, the cost of growing weed outdoors fluctuates dramatically.
The Yield of Growing Weed Outdoors
Aside from the cost — everyone wants to know how much weed they can yield outdoors.
Each cannabis strain contains an estimated maximum yield — anywhere from 150-grams to over 1,200-grams per plant. However, the final yield of your outdoor crop is heavily dependent on multiple factors, such as:
- Genetics
- Outdoor environmental conditions
- Ease-of-growth
As long as you cultivate easy-to-grow genetics in a suitable environment — you’ll be floored by the size of the final yield.
Now, let’s take a look at potential yields that you can attain within 7-12-weeks of flowering from feminized and autoflowering strains.
- Feminized indica: 250-grams to over 700-grams per plant
- Feminized sativa: 400-grams to well over 900-grams per plant
- Feminized hybrid: 450-grams to over 1,000-grams per plant
- Autoflowering indica: 150-300-grams per plant
- Autoflowering sativa: 150-400-grams per plant
- Autoflowering hybrid: 150-350-grams per plant
Remember, these are potential yields, and each seed pack will provide a maximum yield per strain. Even if a pack of Banana Kush OG seeds says the maximum yield is 500-grams per plant — you may only produce 350-grams.
Feminized strains out-yield autoflowering varieties because they grow from May to the end of July. Feminized strains can grow into massive cannabis trees during the vegetative period. As you can imagine, this sets the stage for an equally large harvest.
On the other hand, autoflowering cannabis strains complete their entire lifecycle within 8-12-weeks (germination to harvest). Typically, auto strains vegetate for 1-2-weeks, which does not allow for substantial growth. As such, auto strains are small in size and produce an equally humble harvest.
Ultimately, autoflowering strains trade yield for speed. If you wish to increase the yield of an autoflowering strain — simply grow more plants at once.
Q: How Much Does One Marijuana Plant Yields Outdoors?
A: Each outdoor cannabis plant can yield between 150-1200-grams per plant.
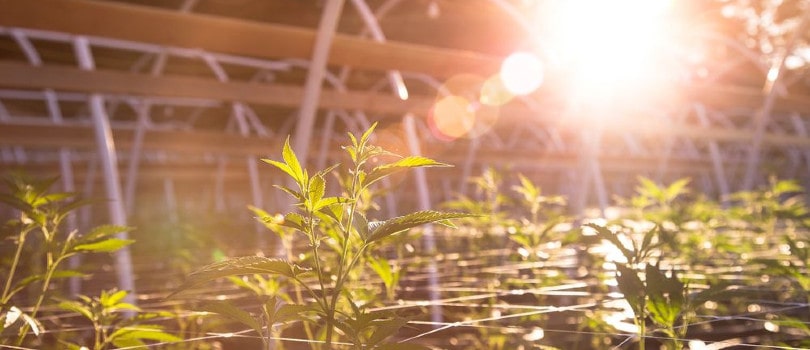
The final yield of your outdoor crop is heavily dependent on multiple factors, such as genetics, outdoor environmental conditions, and ease-of-growth.
Total Value For Money and Effort
Without a doubt, growing your own weed outdoors is a liberating feeling.
However, is it worth it?
In other words, did your investment in equipment and seeds pay off with a substantial yield? Overall, the more weed you grow outdoors — the higher the final yield. Therefore, you must combine the total yield and investment cost to determine the total value for money and effort spent.
Let’s take a look at the primary method to determine the total value for money and effort spent. Additionally, we recommend that you read our in-depth guide on How to Increase The Total Value for Money and Effort of Growing Cannabis outdoors (Comming Soon…).
Potential Cost Per Gram of Growing Cannabis Outdoors
First, let’s look at the price per gram for a garden with a single cannabis plant:
– If your outdoor cannabis garden costs $300 and yields 400-grams — the price per gram is $0.75.
Now, let’s look at the price per gram for an outdoor garden that holds ten cannabis plants:
– If it costs $2,000 to set up the garden and each plant yields 400-grams, the total harvest is 4,000-grams; or, $0.50 per gram.
Therefore, it’s best to grow multiple high-yielding feminized or autoflowering seeds outdoors to obtain a low price-per-gram.
Which Strains Are Best For Growing Weed Outdoors?
Next, it’s time to learn which strains are best for growing weed outdoors.
Remember, the strain of your choosing must hold specific characteristics that allow it to support itself in the great outdoors. Read below for a list of criteria to choose the best outdoor feminized or autoflowering weed strain.
How to Choose The Best Outdoor Weed Strain
We know, there are thousands of cannabis seeds to choose from.
Here’s a list of criteria to choose the best outdoor weed strain:
- Indica, sativa, or hybrid?
- Are they feminized or autoflowering?
- Grow difficulty
- Resistance to pests and diseases
- Resistance to weather fluctuations
- Naturally supportive stems and branches
- Yield potential
- Cannabinoid content
- Terpene profile
- Bag appeal
- Overall value
Head over to Step 3 — Buy Your Cannabis Seeds on our Growing Marijuana Guide and read the section titled how to choose the best cannabis strains. Once you’re done reading, you’ll have a clear idea of how to select the best feminized or autoflowering strain for your outdoor garden.
The Best Outdoor Strains For Beginners
Researching cannabis strains that are ideal for the great outdoors and beginners is time-consuming.
Here are a few beginner strains that yield buckets of bud and grow beautifully outdoors:
- Chocolope
- Super Skunk
- THC Bomb
For a complete overview, read our full list of the best outdoor cannabis strains that’ll turn your outdoor garden into a bud farm.
What Equipment is Needed To Grow Weed Outdoors?
As we mentioned previously, the amount of equipment needed is determined by the number of plants in your outdoor garden.
Furthermore, your budget will dictate whether you opt for hand-watering or a remote-operated drip system. As you can see, the amount of equipment needed will vary depending on your overall plan.
Here’s a list of mandatory items when growing weed outdoors:
- Nutrients (bagged soil, amendments, or liquid nutrient)
- Containers (unless planting directly into the ground)
- Watering can
- Organic preventative spray
- Feminized or autoflowering seeds
- Trimming scissors or pruning shears
- Support Poles
Here’s a list of additional items that may enhance your outdoor cannabis garden:
- Drip irrigation
- Irrigation pumps
- Greenhouse
- Irrigation controller
- Trellis netting
- pH meter
- PPM or EC meter
Should You Use a Greenhouse or Not?
One question that pops up frequently is if you should use a greenhouse or not.
Overall, this is a question that only you can answer. Depending on the size of your outdoor cannabis garden, a greenhouse may or may not be feasible. Furthermore, your budget may limit your ability to buy or build a small greenhouse.
If you do decide to use a greenhouse, you must choose to:
- Build your own greenhouse
- Buy a pre-made greenhouse
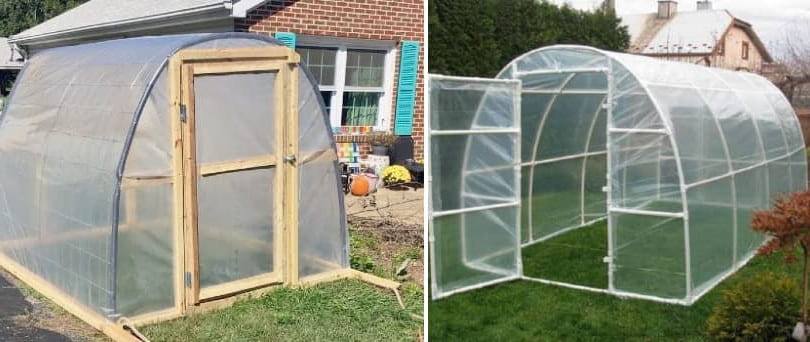
Build your own or buy a pre-made greenhouse.
Remember, marijuana is a hardy plant and can withstand the rigors of the great outdoors. Therefore, if you don’t have the option to use a greenhouse — don’t worry.
Read our guide on The Benefits of Growing Weed in a Greenhouse (Comming Soon…) to determine if a greenhouse is right for you.
How Do You Plan An Outdoor Cannabis Garden?
Now that you’re ready to set up your outdoor cannabis garden, it’s time to learn how.
Read our ultimate guide on How to Plan an Outdoor Cannabis Garden in Ten Easy Steps to simplify the process.
However, here is the basic flow when planning and setting up an outdoor cannabis garden:
Step 1: Determine Your Local Climate
Step 2: Choose the Best Cannabis Seeds For Your Region
Step 3: Find the Ideal Spot for Your Cannabis Garden
Step 4: Determine the Number of Cannabis Plants you Want in the Garden
Step 5: Decide Between the Ground or Containers
Step 6: Buy Nutrient-Rich Soil or Soil Amendments
Step 7: Construct Protective Measures for Your Garden
Step 8: Incorporate an Irrigation Strategy
Step 9: Plan an IPM Strategy
Step 10: Wait for the Growing Season to Begin
What is The Growing Season For Outdoor Cannabis?
Tis’ the season to grow weed.
Unlike growing marijuana indoors, outdoor cannabis plants have a short window of opportunity due to the changing seasons. Regardless of which hemisphere you reside in, the ideal time to grow marijuana outdoors is from early May to late October.
Read The Outdoor Grower’s Almanac — our in-depth and beginner-friendly guide on the growing calendar for outdoor cannabis plants.
You’ll discover a breakdown of each month, the influence of the seasonal light-spectrum, and the role of photoperiodism. As you’ll come to find out, each of these topics influences the overall growing season.
How Do You Grow Marijuana Outdoors?
Now that you have the essentials, it’s time to learn how to grow marijuana outdoors.
Let’s begin with a generalized step-by-step process.
Step One: Germinate Cannabis Seeds
The first step is to germinate your feminized or autoflowering seeds indoors or after the last frost outdoors.
Learn how to germinate seeds by reading our guide on How to Germinate Cannabis Seeds. Once you learn the basics, you’ll soon understand:
- How to germinate cannabis seeds with paper towels
- How to germinate cannabis seeds with rooting cubes
After 3-7-days, the seedlings will begin their journey and start to reach for the light.
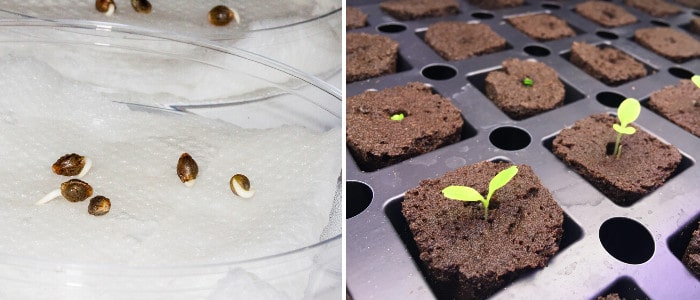
Paper Towel and Rooting Cubes Germination Techniques
Step Two: Transplant Cannabis Seedlings
Next, you must transplant the cannabis seedlings.
In this step, you will place the seedling into a new home, such as:
- Containers filled with soil or pre-dug plots
Transplanting may seem difficult at first. Avoid common beginner’s mistakes and read our guide on How to Transplant Cannabis Seedlings in Five Easy Steps.
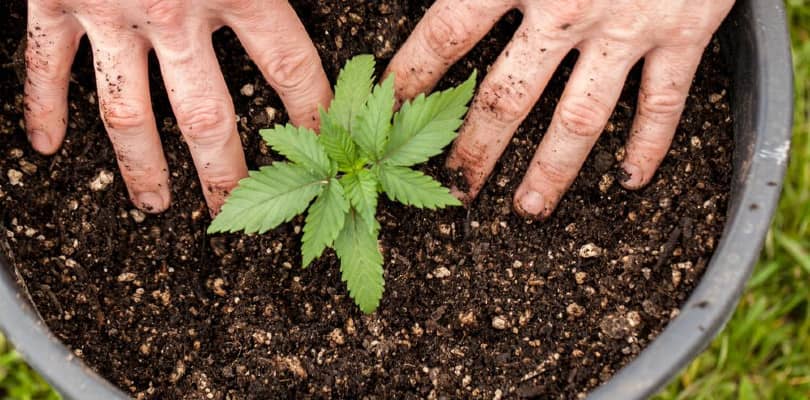
In this step, you will place the seedling into a new home.
Step Three: Plant Care and Maintenance During The Vegetative Phase
Cannabis plants excel outdoors during late spring and early summer days, where the days are long.
At this point, your cannabis plant will rapidly produce new stems, leaves, and root growth. Known as the vegetative stage, you must perform regular plant maintenance to ensure your garden doesn’t turn into an outright jungle.
Here are a few methods to employ during the vegetative phase:
Continuously monitor the plant(s)
Half of the battle of growing weed is monitoring.
Remember, big things have small beginnings; therefore, you must pay attention to every detail. We’ll assist you along the way in the form of The Ultimate Guide of Plant Monitoring During The Vegetative Stage (Comming Soon…).
Ensure an adequate watering schedule
Watering cannabis plants isn’t as simple as it seems. From hand watering to drip irrigation, you must avoid the pitfalls of over and under watering your beloved outdoor cannabis crop.
Read our Ultimate Guide on Irrigation For Cannabis Plants to ensure an adequate watering schedule.
Train the cannabis plant(s)
Training allows cannabis cultivators to adjust plant size and increase the overall yield of marijuana plants. Overall, manipulation is the key, whether it requires you to cut off a section of the plant or bend it to promote a specific reaction.
As you’ll soon find out in our encyclopedia of training methods, you’ll discover how to:
- ScrOG
- Top
- FIM
- LST
Allow the plant(s) to grow naturally
Another option is to allow cannabis plants to grow naturally.
In other words, you may leave the plant to grow into a 10′ cannabis tree. Many outdoor cultivators prefer massive plants, allowing for an equally large yield and reducing the need for labor-intensive maintenance.
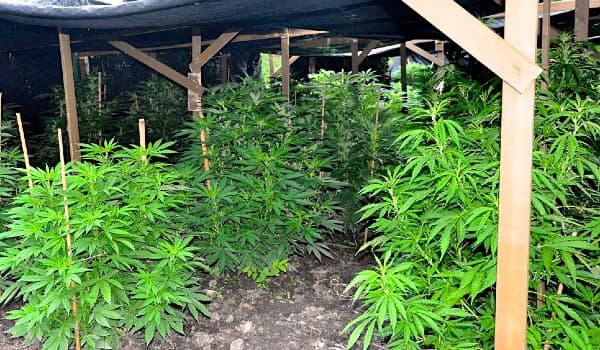
At this point, your cannabis plant will rapidly produce new stems, leaves, and root growth.
Step Four: The Beginning of The Flowering Phase
As the summer months breeze by, the days begin to shorten after the summer equinox. At this point, fall is on its way, which heralds the beginning of the flowering phase.
Here’s a list of crucial information regarding the flowering process:
- The flowering stage begins with the pre-flowering stage
- After the pre-flowering stage, cannabis plants are in full bloom
- Cannabis plants in flower require specific care for an optimized yield
- Cannabis plants may flower for 7-12-weeks depending on strain and weather conditions
- Ensure the garden is free from pests and diseases
Step Five: Plant Care and Maintenance During The Flowering Phase
The flowering phase is the most exciting stage for new and professional marijuana growers alike.
However, you must ensure the marijuana plants receive optimal care during this critical stage in their life. Here are a few ideas to enhance your outdoor cannabis garden during the flowering stage:
Ensure adequate watering schedule
The flowering cycle is the full-steam-ahead moment of the cannabis plant. However, the outdoor environment poses dehydrating obstacles in the shape of wind and heat. Therefore, you must learn how to implement an adequate watering schedule during the flowering phase.
Lollipop the plant(s)
Lollipopping the cannabis plant at the beginning of the flowering phase is necessary for improved health, airflow, pest and disease resistance, and an increased yield.
Read our in-depth guide on How to Lollipop Cannabis Plants to ensure you do it right.
Follow the nutrient regimen of “bloom boosters”
Although the soil has all of the necessary nutrients for your cannabis plant, you may want to introduce a bloom booster into your garden during the flowering stage.
Bloom boosters are products that contain an abundance of P and K, which are known to stimulate the production of massive flowers.
Read Our Guide on Bloom Boosters and discover everything you need to know to push your outdoor weed crop to the limit.
Monitor the crop daily
The flowering stage is crucial because so much is changing. As the pistils emerge and the cannabis plant grows in size, you may find yourself with a full-time job as you care for your outdoor crop.
Read our inspection guide — The Beginner’s Ultimate Guide on Monitoring Cannabis Plants in The Flowering Stage (Comming Soon…), where you’ll learn how to check for insects, monitor bud growth, and much more. Our inspection guide has it all, and you’ll soon discover what to look for as you gaze over your outdoor cannabis crop daily.
Supporting Your Cannabis Crop
As the cannabis plant produces flowers, the accumulated weight may present a new danger for the branches. The last thing you want is broken branches, which is why we’ve made a guide on How to Support Your Cannabis Crop (Comming Soon…) with trellis netting or support poles.
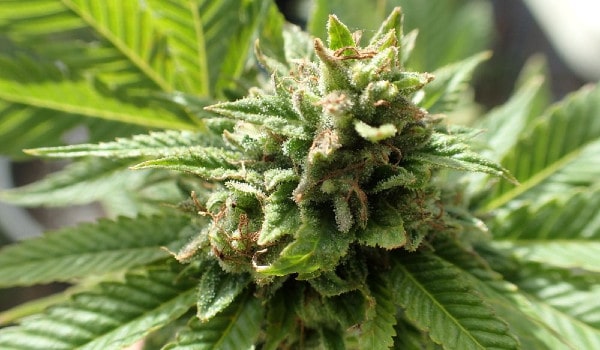
The flowering cycle is the full-steam-ahead moment of the cannabis plant.
Step Six: Determine Trichome Ripeness
After 6-8-weeks, cannabis buds will begin to stack on the weight and produce thick resin glands. It’s at this point that you must determine the optimal outdoor harvest window.
Follow these steps, so you don’t harvest too early or too late:
- Check the breeder or seed bank’s estimated flowering time for the particular strain
- Check if the pistils are mostly orange
- Use a loupe and check if most of the trichomes are milky or cloudy in color
Remember, mostly milky and cloudy trichomes are a dead giveaway for ripe weed. Therefore, follow our guide on How to Check Trichome Ripeness to ensure the most potent bud possible.
Step Seven: Harvest the Cannabis Flowers
Once the flowers are ripe, mark your calendar — it’s harvest day.
After months of labor, your cannabis flowers are ready for harvest. Here’s a wrap-up of our in-depth guide on How to Harvest Cannabis Flowers:
- Stop feeding bloom boosters and cease watering the cannabis plants
- Cut the base of the plant and hang it upside down in a converted shed or room for drying
- Allow the cannabis plants to remain in total darkness for 24-48-hours
Step Eight: Manicure and Dry The Cannabis Flowers
Now, this is the sticky part of growing weed.
It’s time to learn from our guides on How to Dry Cannabis and How to Manicure Weed Flowers.
- Allow the hanging plants to dry for 2-7-days, depending on environmental conditions
- Remove the large fan leaves first
- Use fine trimming scissors to remove secondary fan leaves
- Perform a final manicure
- Place into a cardboard box or brown paper bag for 24-48-hours
Step Nine: Cure The Weed
One of the final steps of harvesting cannabis indoors is to cure the weed.
Like fine wines, cannabis must undergo a curing process to elevate its aroma, flavor, and potency.
Use our guide on How to Cure Weed to transform mediocre buds into pure fire.
You’ll need:
- Glass jars
- Boveda (or similar) humidity packs
- Patience
Remember, you spent the last handful of months tirelessly working to grow cannabis outdoors, so what’s an extra 1-2-weeks during the curing process?
Step Ten: Store The Weed
You’ve officially grown weed outdoors!
The last step is to stash your weed in a suitable home. Like how there’s an app for everything, here’s our step-by-step guide on How to Store Weed.
Here’s a snippet of storage containers that are suitable for storing weed:
- Glass jar
- Weed-specific container
- Vacuum-sealed bag
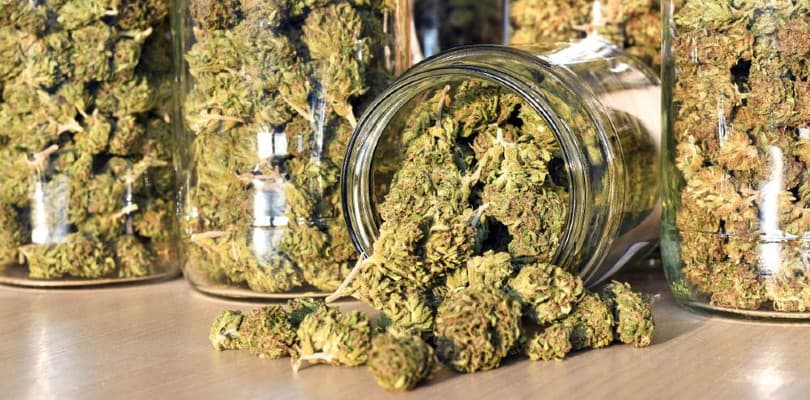
Congrats! You’ve officially grown weed outdoors!
Now, it’s time to indulge.
Outdoor grown weed is everything you hoped it would be — sticky, aromatic, flavorful, and it knocks your socks off. Outdoor grown buds are unforgettable because you put in the hard work.
You’ve come a long way from zero to cannabis hero by following our step-by-step guide on growing weed outdoors.
